|
Current Setup
My current setup, which is a huge change from the safe Skywatcher 72ed step up to the more expensive, but is still capable of being moved to remote locations for the travelling Astro Photographers (AP), but this setup takes up more space in my car due to the new mount and the scope itself (not to mention the additional weight). Note - this equipment isn't light and may not suit everyone. My setup now consists of the following.
Items which I have yet to purchase but aren't fully essential.
My Living arrangements are still the same and I must travel out for AP so the whole setup has to be portable. |
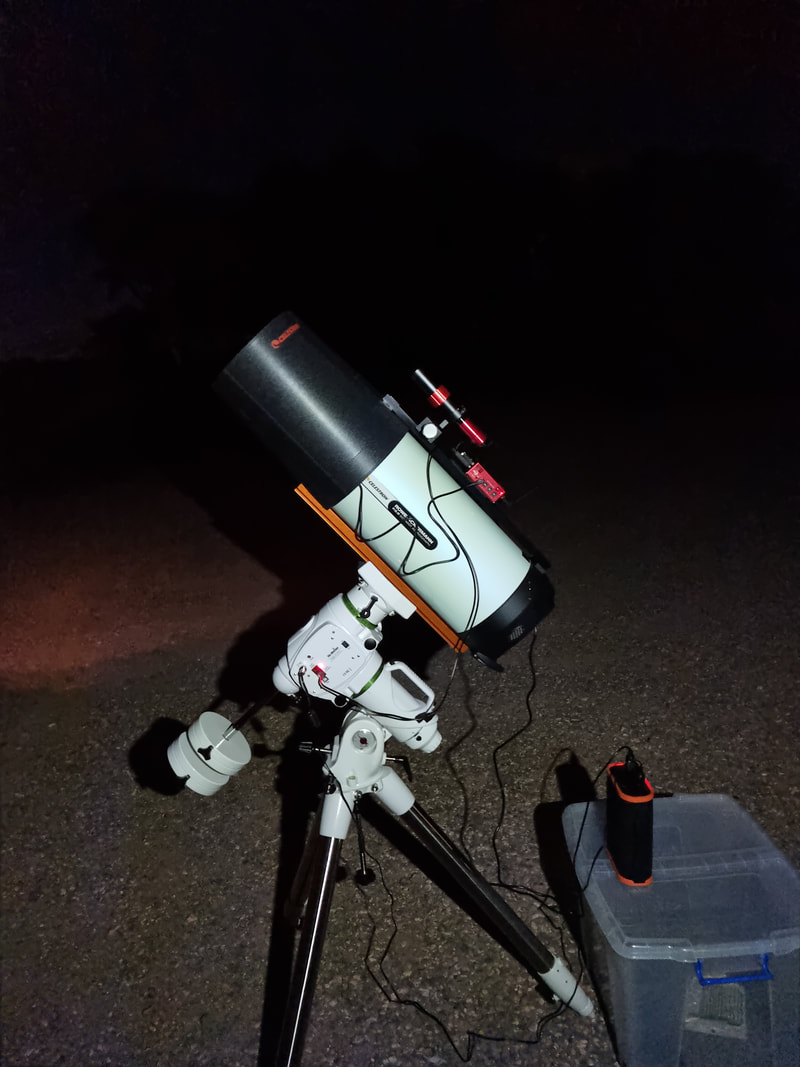
Current setup including the RASA8, Skywatcher EQ6 R Pro and various ZWO products.
|
Mount
My new mount is the Skywatcher (SW) EQ R Pro. This heavy-duty computerised mount is the second largest I can go for portability with the SW range. The mount cames in two (Very heavy) boxes, one for the tripod legs, and the other for the body of the mount.
To travel around, the mount is separated, and the body of the mount is stored in the foam in which it is delivered (until I can get the case made for this mount – but to be honest, the foam is doing just fine). Setting up is about the same as the EQ5 mount, except I take the EQ 6 mount apart fully to store away, the only thing to keep in mind is the weight, which is substantially more than the Eq5 mount (I can lift the EQ5 mount with one hand to shoulder height but the body of the EQ6 R Pro I can’t do that it weighs about ~17.5kg (38.5lb))
It came with two weights, both of which are being used for this setup (seen in the picture above). Additional weights can be purchased for larger scopes etc. which is not required yet.
The EQ6 R Pro can take 20kg (44lb) as max weight for AP with the setup I use, this doesn’t come close to the max limits of the scope and the tracking is around 0.5-0.8 RMS. I went for the EQ6 R mainly for the carry handle – it makes life so much easier.
|
Scope
I’ve upgraded to the Celestron RASA 8 from my SW72 ED. The FOV is near enough the same, but the RASA can take pictures far faster than the SW72. As an example, a ten-minute exposure with the SW can be done in about 60 secs with the rasa, giving you the option of an early night, multiple targets or additional time on the same target. The scope weighs about 7.5kg (16.5lb) OTA with all the equipment attached this goes up to about 10kg (22lb). Like all scopes, the RASA has pros and cons (see my review on the scope) but these can be overlooked because of the speed of the scope in taking pictures. I’m still in the early stages with the scope, so I’m carrying it with two hands (top and bottom over the handle at the end) gently putting it in the box and on the mount etc. The part to remember is you need to cool down the primary mirror before any AP but there is a fan built into the back which speeds this process up. Just connect it to a power source after it’s attached to the mount and by the time you are ready for your first photo, the mirror will be sufficiently cooled. A weird thing to get used to is the camera at the front of the scope rather than the back, making a dew shield almost essential due to calibration frames at the end of the night. The other note is the price point of everything for the RASA is set slightly higher, there will be cheaper alternatives but filters, filter drawer and even the Celestron dew shield are expensive (the aluminium version is £160). 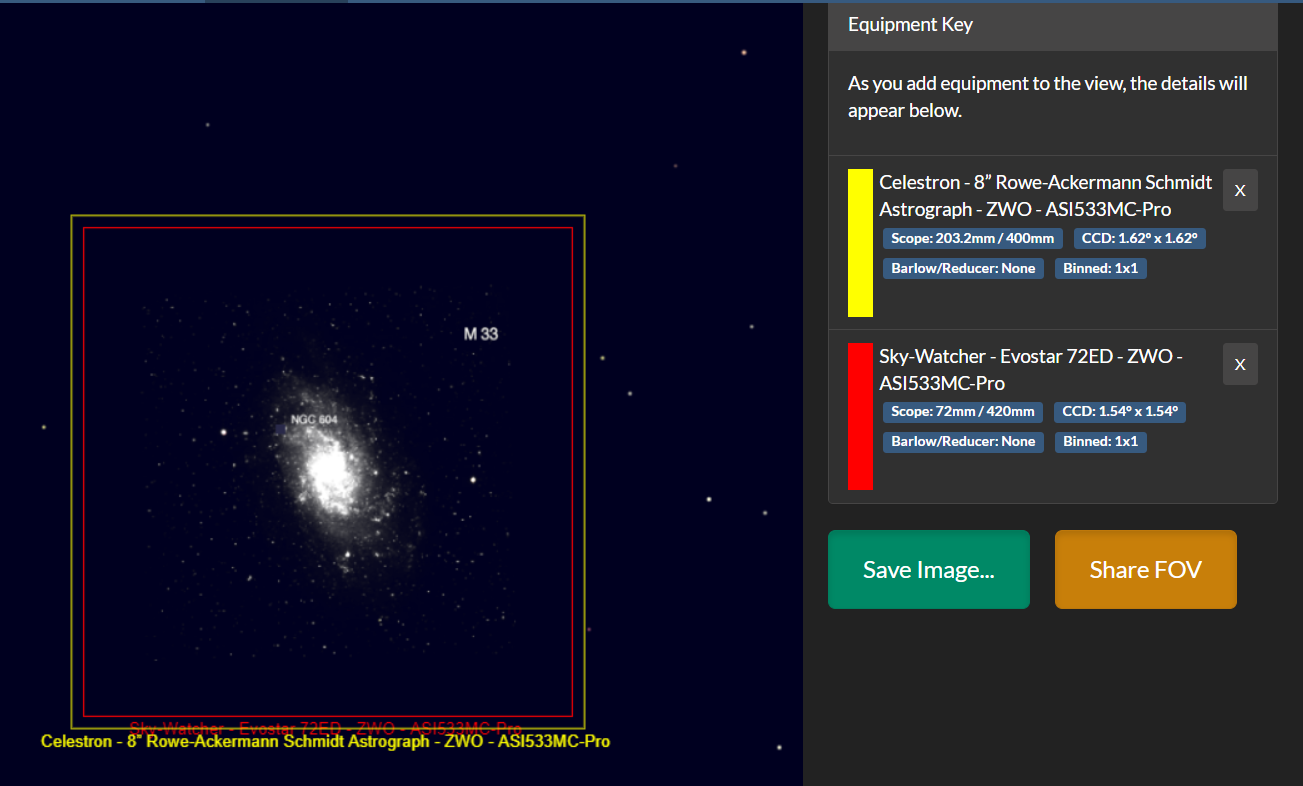
The FOV differences between the SW 72ed and the RASA 8 both using the ZWO ASI 533mc Pro - https://astronomy.tools/calculators/field_of_view/
|
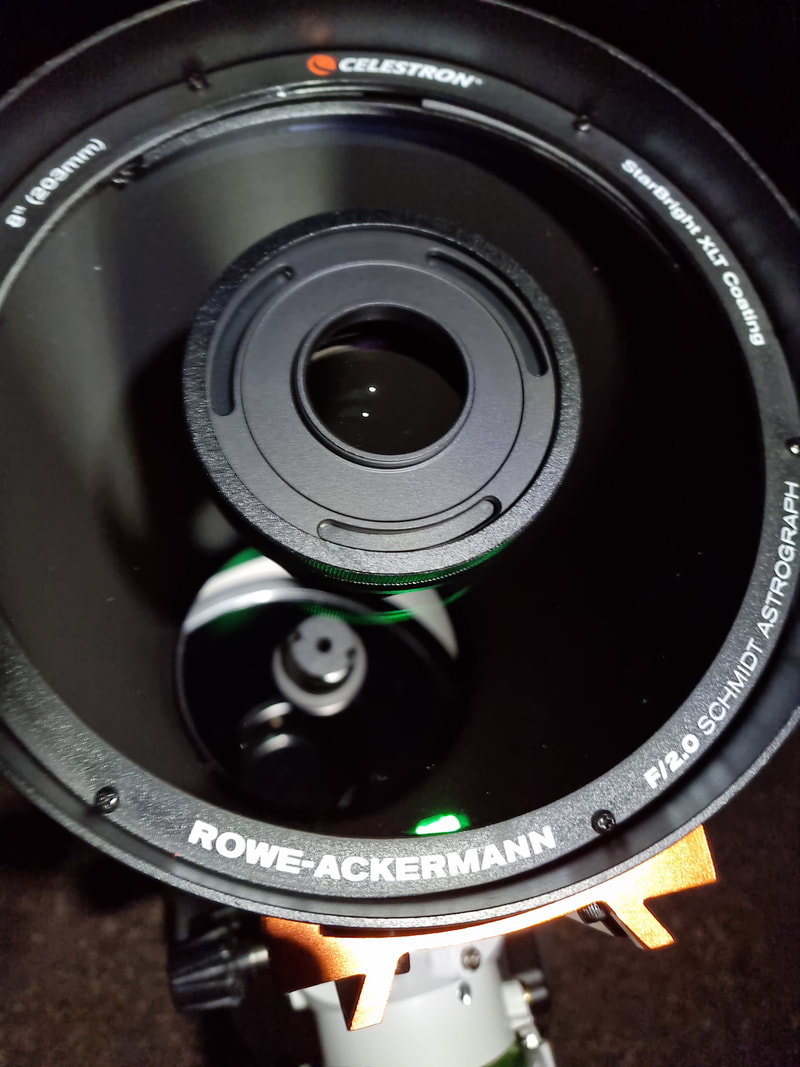
The business end of the RASA 8. The adapter has been attached in this picture.
|
ZWO ASIAir Pro
I still use the ZWO ASIAir Pro control box. Instead of it being threaded to the ring of my scope (which can’t be done with this scope as there are no rings) I have got heavy-duty Velcro on the air and accessory rail. It is happily attached just behind the guide scope.
I still use the ZWO ASIAir Pro control box. Instead of it being threaded to the ring of my scope (which can’t be done with this scope as there are no rings) I have got heavy-duty Velcro on the air and accessory rail. It is happily attached just behind the guide scope.
Guide Scope and Guide Camera
I still use the same guide scope and Camera – ZWO ASI 120mm camera and the ZWO 30mm guide scope. So far, I have not had any issues with guiding or issues with setup with the new scope. Unless the tracking becomes an issue, I won’t upgrade or swap out for a large guide scope and camera.
I had to buy an accessory for the guide scope so it could attach to the guide rail (see aftermarket upgrades)
|
Main Camera
The ZWO ASI 533mc Pro still does me proud (Although I have my eyes on the 2600mm/mc) The camera is small and light. The 9MP camera with no AMP glow works well with the new scope and mosaics can be done in one night with no issues. In the picture shown the cameras dew heater is still attached. This has been removed for the RASA as the lead and zip tie gets in the way of the glass and can lead to odd shaped stars. |

|
|
Filters
Due to the focal ratio of the RASA 8, I’ve had to change the filters. The Optolong L-eXtreme wasn’t corrected for F2 scopes (although they are bringing one out for the F2!) so I had to purchase another filter. The IDAS NBZ dual-band filter is designed for F2 scopes and was the first choice (near enough the only choice), this 48mm filter (which doesn’t come in smaller sizes) is my go-to filter and takes some breathtaking photos. (It is customary for me to stupidly touch the glass when I first take it out of the box, done it with the last two filters and it was no different here) |

IDAS NBZ filter for F2 scopes
|
Filter Drawer
The filter drawer, again, had to be changed. Starizona has made a filter drawer designed for the RASA. Its slim design is good for the RASA 8 optics and doesn’t get in the way. The magnet is strong and holds the drawer in place with no issues. Additional drawers can be brought for multiple filters making the filter swapping easy and painless.
The issue is the dew shield having to be taken off and put back on again (If you are using the cheaper version). If this is done, pause guiding and slew back on target before continuing to make sure it is in the correct position. Every time I have messed about with the dew shield to get access to the filter drawer, I’ve moved the scope slightly.

Starizona filter drawer, small and compact to be used with the RASA 8.
|
Dew shield and Dew heater
Dew shield I’ve made a section for this for a good reason. The dew shield is essential for this scope, especially in the winter periods. There are different versions you can purchase (or even print if you have a 3d printer large enough),
Dew Heater The picture on the right, while the same picture above, is used to show where the Dew ring goes. You unscrew the ring pictured and place the ring in the same position (Use the instructions provided to to this, its easy to install but requires a certain way to attach it) There is two wires attached to the ring heater, one for the power and one for the thermostat which can be seen in the picture on the bottom right.. |

RASA 8 dew heater ring location (Note - Temporary picture till the ring is purchased and attached to the scope).

Celestron Dew Heater Ring
|
|
Power banks
I use the same power bank as before. The Fox Halo 96k power bank has not disappointed me and holds its charge for several nights. Once the dew heater ring is installed a new power bank might be needed as it will be an additional power point (since the ASIAir and the mount run on separate points, I would rather use another bank for it). |

|
Aftermarket upgrades
Accessory rail for the RASA
I purchased an accessory rail for the RASA 8 so I could attach the guide scope, ASIAir box and any other equipment I need in the future. It also doubles up as a holding handle (although I would suggest supporting the base of the scope at the same time)
The only thing I had to do was cut the foam out to allow it to fit in the box without damaging anything.
The rail came with everything to attach the rail to the scope, the scope has multiple locations for it to attach to and the bolts are supplied to the scope for the rail.
Mounting accessory for the guide scope
A mounting accessory had to be purchased to allow the guide scope to be attached to the rail since there is no shoe on the scope for any guide scopes.
This accessory is well built and hols the guide scope tightly on the rail (wants to... it’s the same size near enough as the guide scope)

Accessory rail with attached ZWO ASIAir box and guide scope (with the new attachment to allow for the guide scope to be attached)
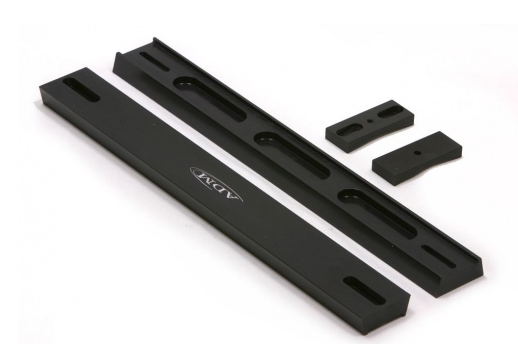
Aftermarket accessory rail for the RASA 8
|
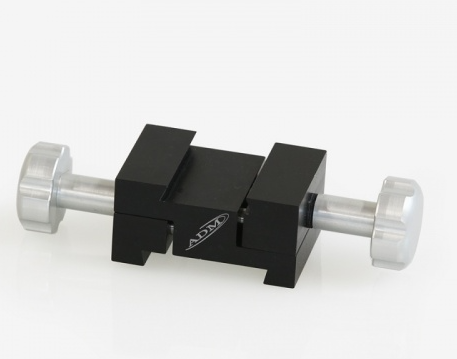
Aftermarket attachment for the guide scope for it to be attached to the accessory rail
|