How to stack in Pixinsight
Processing is a big part of Astro Photography. It is all good to collect all this data, but poor processing reduces the chance of picture quality. Like all things with processing, it is a personal preference to how you like the picture. Your preferences may change over time, but nevertheless, it still is your preference that matters.
This page will show you the process I take with processing Nebula in Pixinsight and list all the add-ons I use. Remember the process is just as important as the pictures, don’t skimp on purchasing decent processing software and add-ons. You spend thousands on AP equipment and a few hundred on processing software is an easy decision. Which software is down to you of course.
Software and add-ons used, price and links:
- Pixinsight (PI)- 250 Euros - https://pixinsight.com/
- BlurXTerminator (BXT) - $99 - https://www.rc-astro.com/resources/BlurXTerminator/index.php
- StarXTerminator (SXT)- $49.95 - https://www.rc-astro.com/resources/StarXTerminator/
- EZ processing suite (EZ)– free - https://darkarchon.internet-box.ch:8443/
- PSF Image (PSF)– free - https://pixinsight.com/forum/index.php?threads/psfimage-script-by-hartmut-bornemann-to-automate-the-creation-of-a-psf-profile.12285/
- Deep Sky Stacker (DSS) – Free - http://deepskystacker.free.fr/english/index.html
This page is solely used to discuss Pixinsight stacking only. See here and here for DSS stacking and processing.
|
Pixinsight uses a different method of stacking. This method uses a lot more space on the hard drive (most of which can be deleted after stacking) but creates a weighted picture, one which is easier to process and one useable for mosaic-style pictures (discussed in another post).
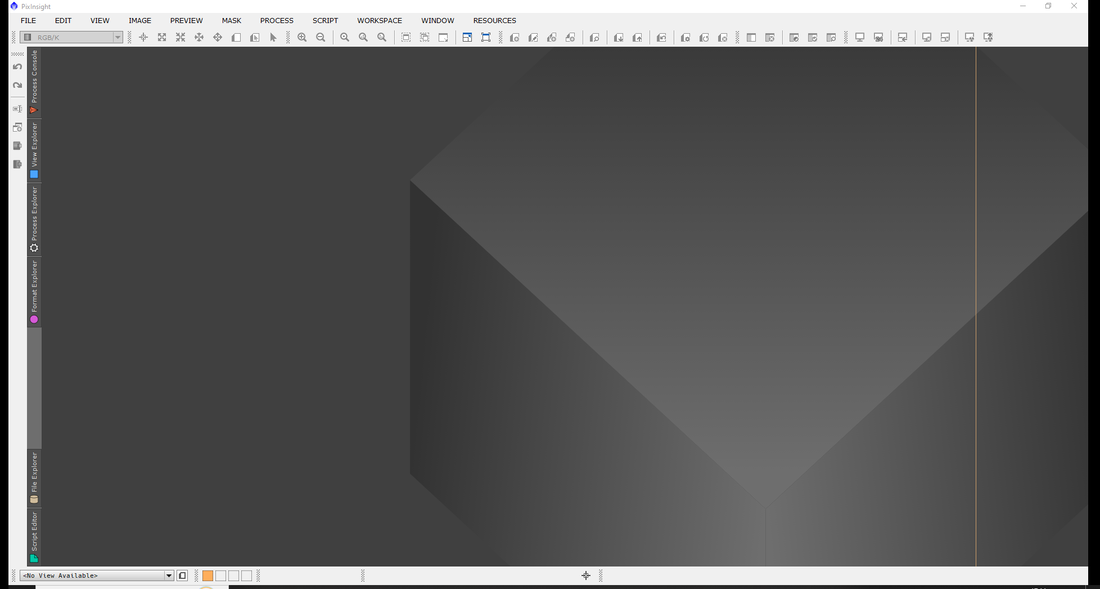
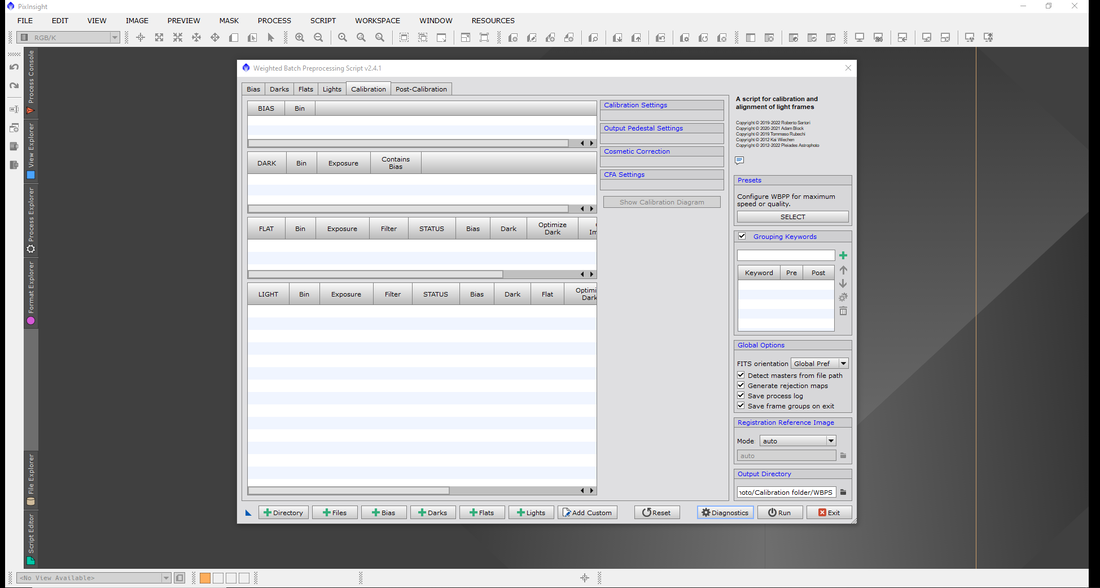
Opening PI gives a blank box, with a lot of tabs at the top and a ton of options in them all as seen in Fig. 1. for stacking, on the top tab, click script, batch processing and Weighted Batch Processing, Fig. 2, which will bring up a box, Fig. 3. |
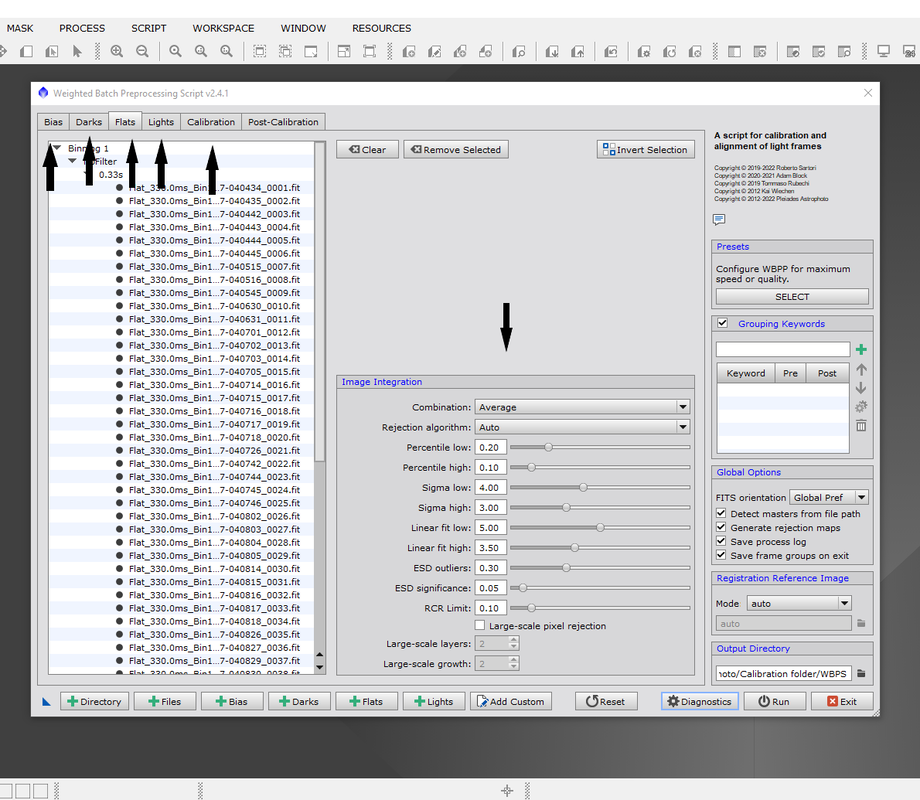
While this looks daunting, it is quite straightforward. Fig. 4 shows the four arrows at the base that are for the bias, darks, flats, and light files. Click on each of these to upload your files for the required location. The software will check if these match, EG., dark files the same as exposure time on the lights etc. They should all have a tick in the boxes as seen in this picture in Fig. 6 (Below)
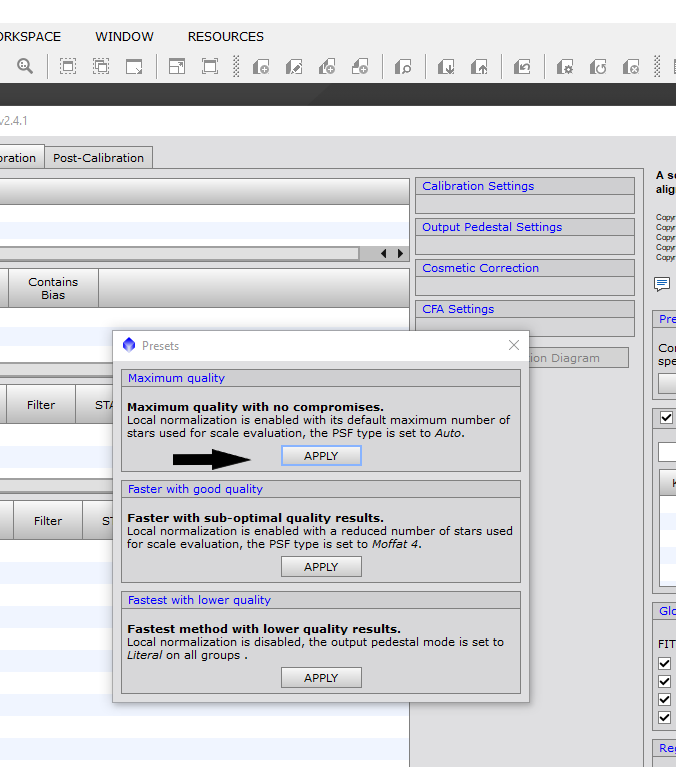
Next click select in pre-sets (top arrow on the right in Fig. 4) which brings up prewetting's for Processing (Fig. 5). It is recommended to use the top setting (maximum quality with no compromises) and click apply.
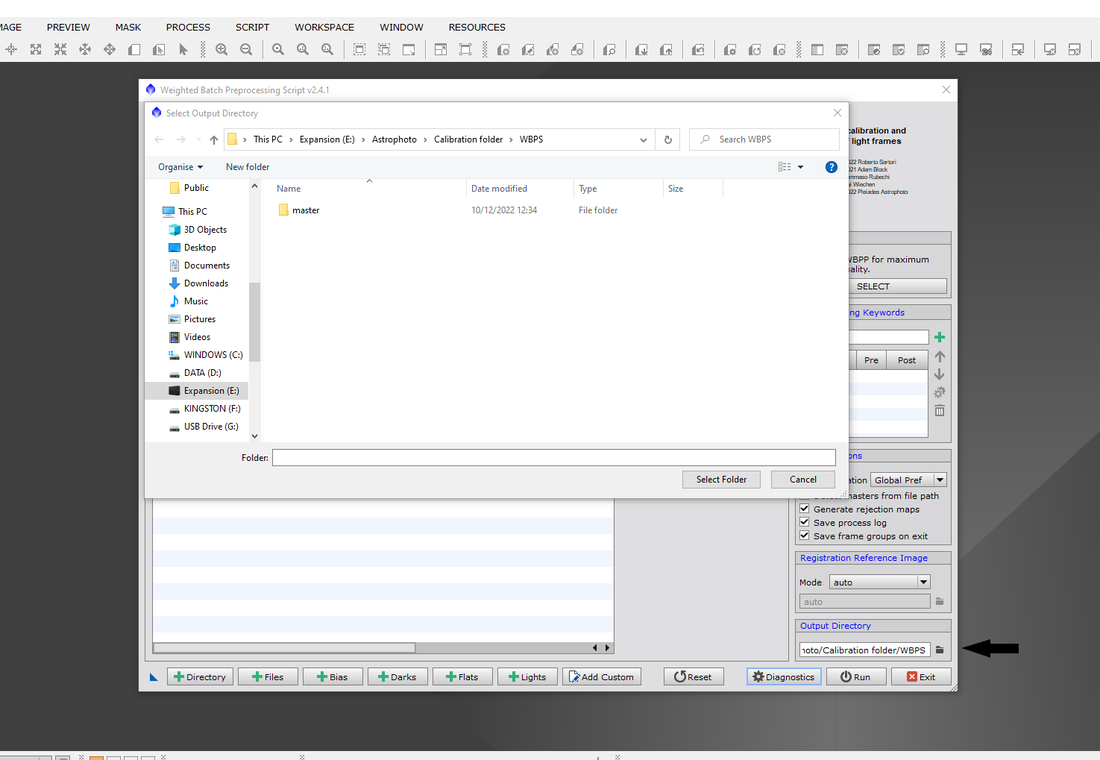
Next, you need to choose an output file (Fig. 7) and click the output directory file on the right-hand side of the file location box. Select a folder (recommended a folder is created for this in a location of choice so all files go here in the future) once you have selected a folder you are nearly ready to start the process.
Above the output, the directory is a registration reference Image mode which is set to auto (recommended to keep as Auto) and all tick boxes should be ticked as standard. In the top tabs, you can go into the individual section of the calibration frames and light frames and adjust the options for each which can be seen in Fig. 8. I generally keep these as pre-set, but they are there for the more advanced users, (most leave as standard)
Above the output, the directory is a registration reference Image mode which is set to auto (recommended to keep as Auto) and all tick boxes should be ticked as standard. In the top tabs, you can go into the individual section of the calibration frames and light frames and adjust the options for each which can be seen in Fig. 8. I generally keep these as pre-set, but they are there for the more advanced users, (most leave as standard)
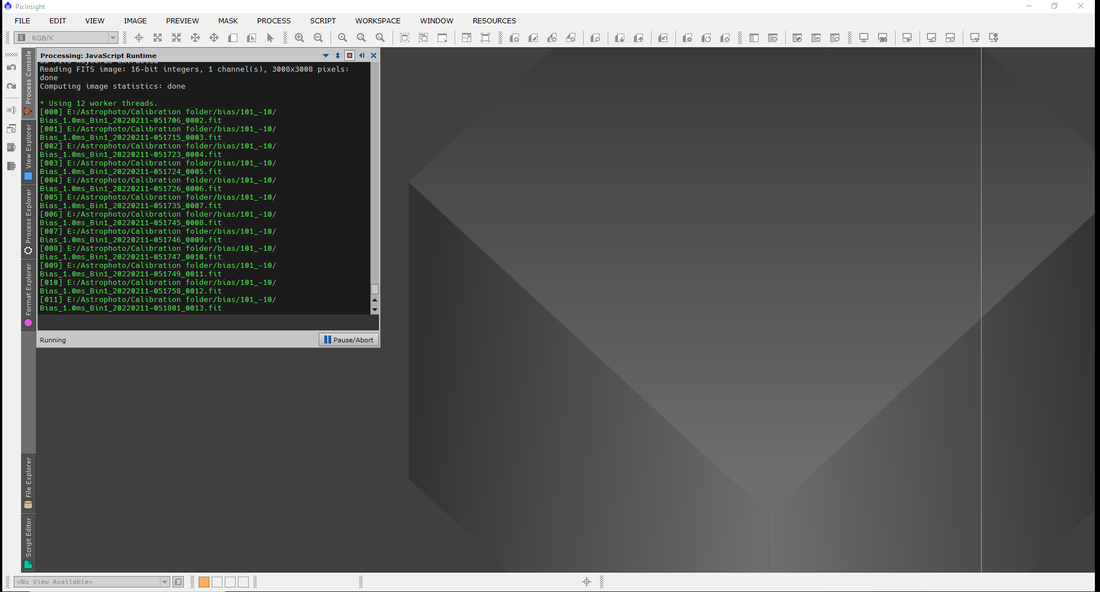
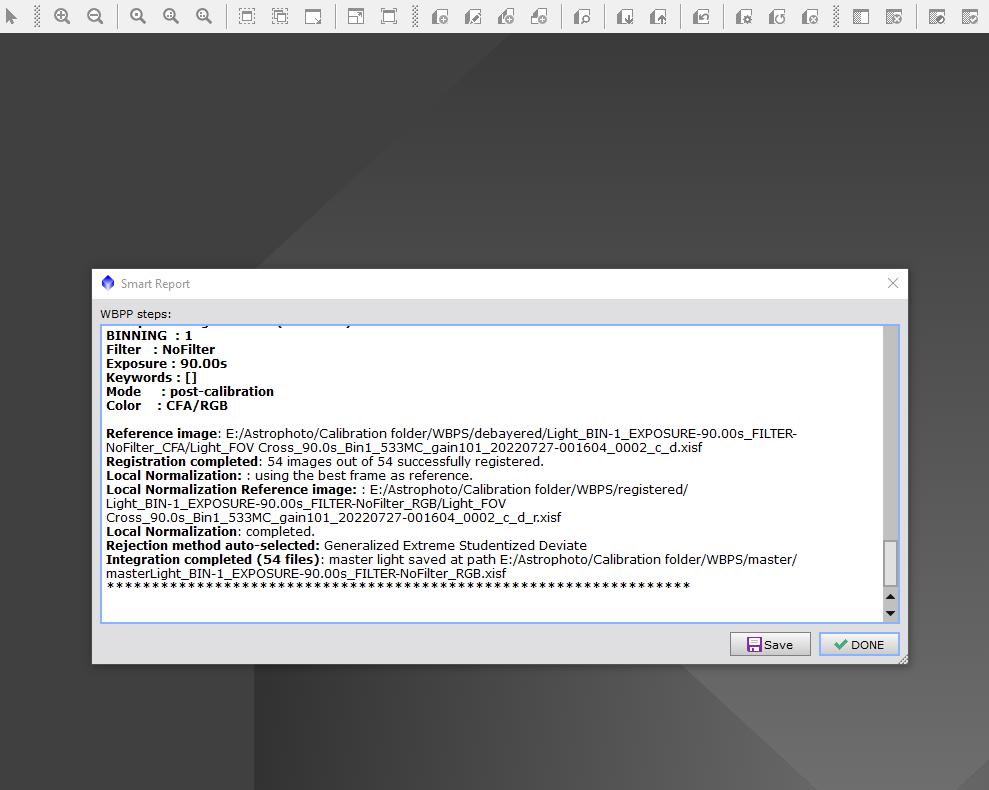
You should now be ready to process your image. Warning this will take up a lot of space on your hard drive! Save at least 100 GB for this process to be safe! This part takes a while, once you start, go away, and come back to the pc in about 20 mins (See Fig. 9 below) to see the progress. . Once complete a smart report will show up giving the details of the process (Fig. 10) you can either save this or click done which will bring you back to the file upload tab from before you started the WBPS.
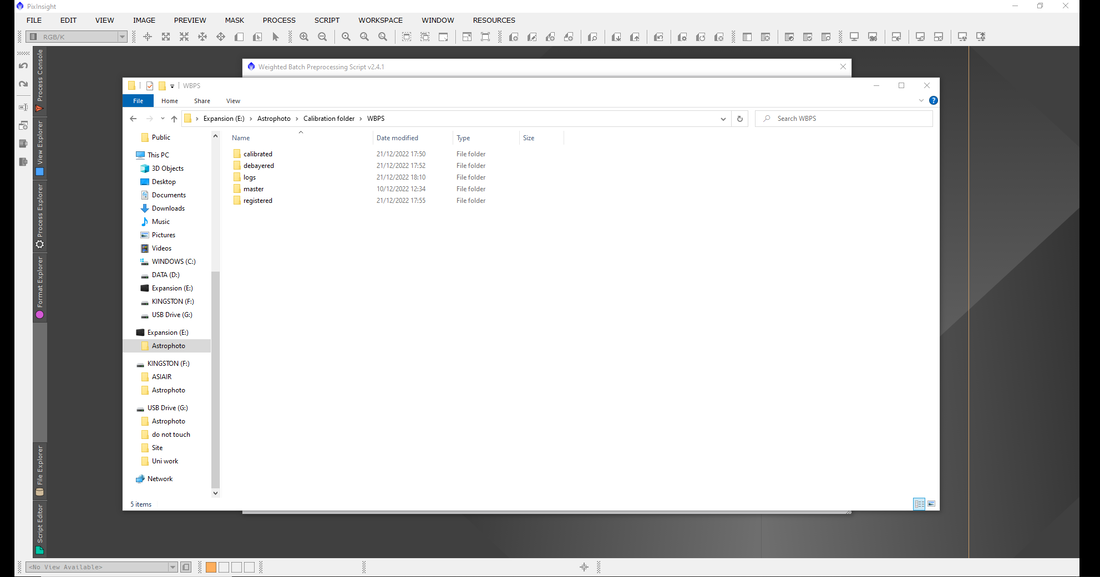
The file will be where ever you said for it to be saved (Fig. 11) which will have 5 folders, most of which can be deleted. The picture file will be in the master folder (Fig. 12) the rest of the files and folders can be deleted if required. (note the other files in the FIG which show multiple documents, one which is created 4 times – this is a mosaic processed recently.
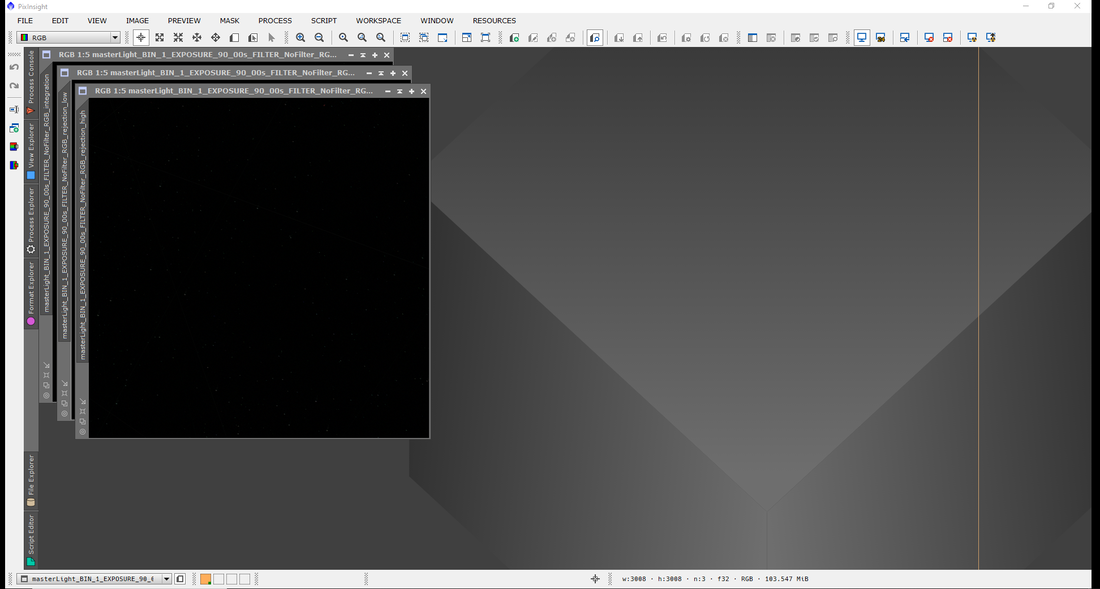
To open this file simply close BPSS, go to the top left-hand corner, click the file, and click open go to the BPSS location, open the master folder, click the most recent file, and click open (Fig. 12) which will open 3 pictures. Two are calibration files and the third is the main picture. (Fig. 13)
To open this file simply close BPSS, go to the top left-hand corner, click the file, and click open go to the BPSS location, open the master folder, click the most recent file, and click open (Fig. 12) which will open 3 pictures. Two are calibration files and the third is the main picture. (Fig. 13)
This routine is quite straight forward but the stacking time is lengthy. It is best to start the stacking just before you need to do work or grab a coffee and do other things while it stacks.
Depending on the number of files, the size of the files will depend on how long this process will take. Stacking files ready for Mosaic pictures will take longer due to the number of pictures in the mosaic. As an example, my 4-panel mosaic took about 2 hours to process to get ready for the next stages of the mosaic.
I hope you found this helpful in your starting stages of Pixinsight. Don't forget to check out the other sections on this website.
