This guide is designed for newcomers to Astrophotography and Astronomy hobbies but can be used by anyone. And is based on people in the Northern Hemisphere.
Firstly – welcome! This hobby, like most others, is a rabbit hole. Once you start going down this route, you will find more things you want, new things to try and different thoughts on everything you once thought was your favourite object in the night sky.
Firstly – welcome! This hobby, like most others, is a rabbit hole. Once you start going down this route, you will find more things you want, new things to try and different thoughts on everything you once thought was your favourite object in the night sky.
Finding your way around the night sky is an important aspect of this hobby. My belief in this is still the same as when I started, which is to use a manual scope with visual astronomy. This helps you understand constellations and their locations, especially if they are not circumpolar (never set below the horizon and are viewable all year round). It also helps to know the navigational direction (North, South, East, and West) fairly easily, especially if you do this hobby in one location.
This page aims to help you understand where Polaris is and its importance in Astrophotography and tracking visual astronomy. This page will help show you where it is in the night sky using constellations from software and actual photos, which will give you a better understanding of its location.
This page aims to help you understand where Polaris is and its importance in Astrophotography and tracking visual astronomy. This page will help show you where it is in the night sky using constellations from software and actual photos, which will give you a better understanding of its location.
|
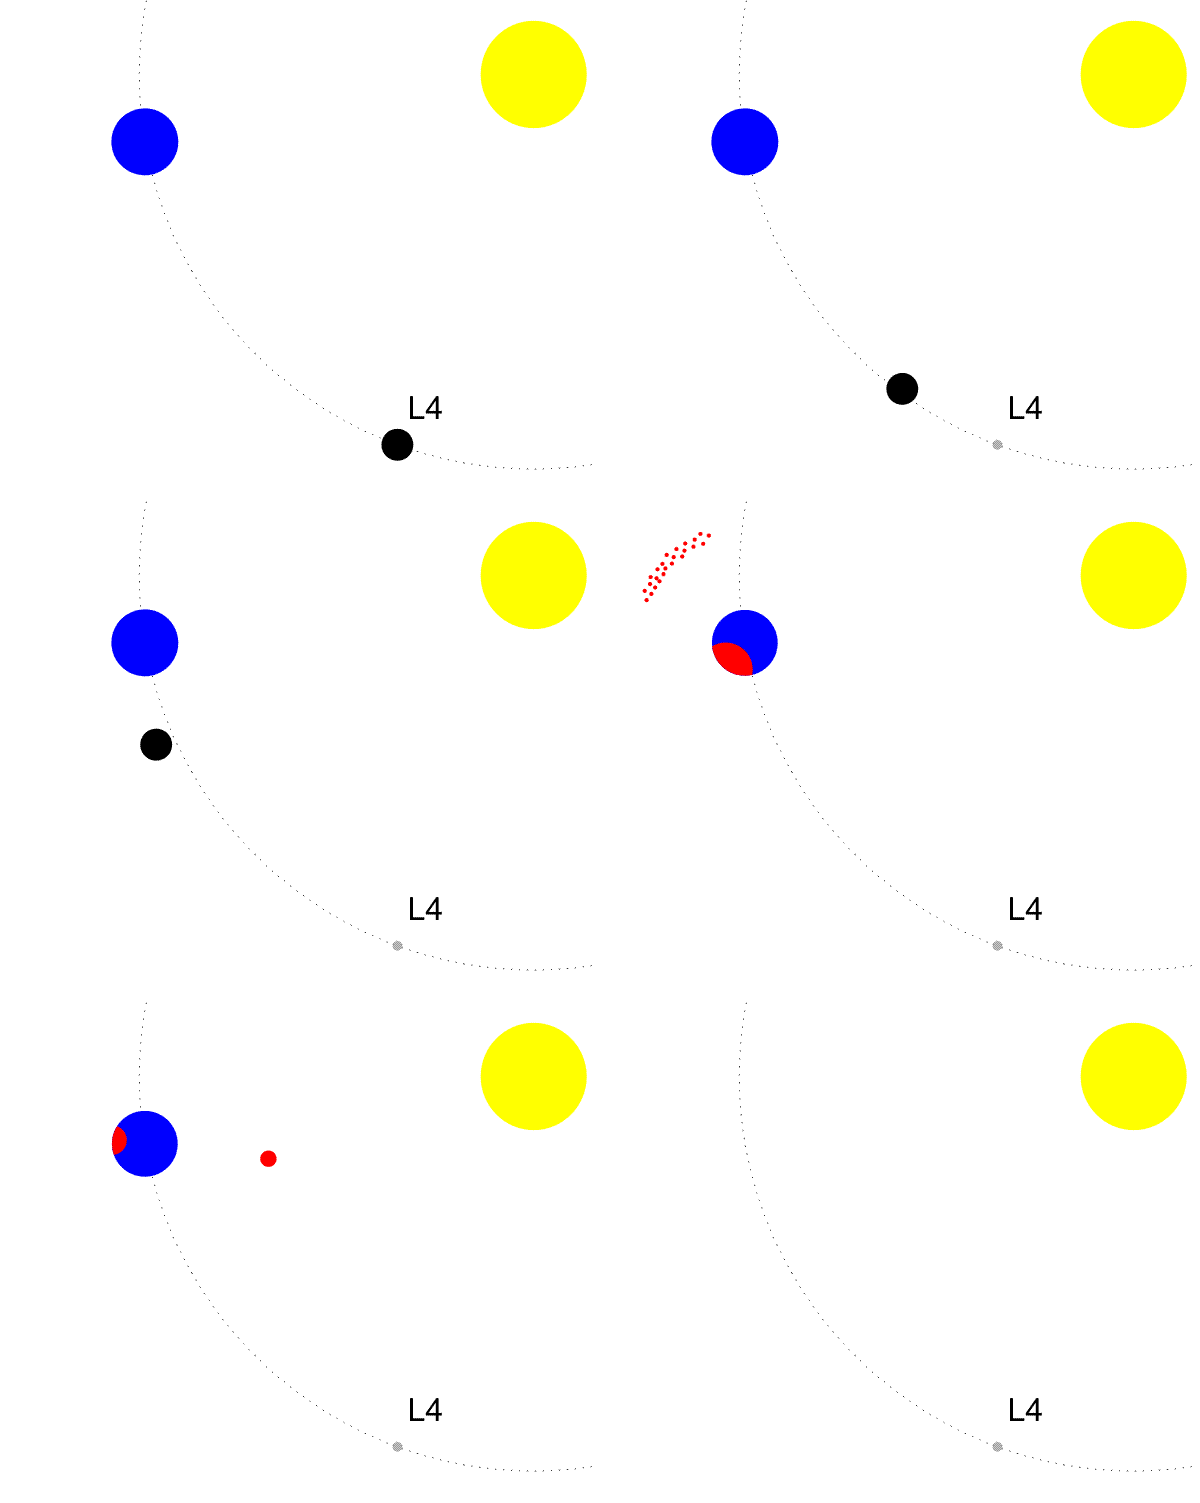
The Celestial Pole (or the North Celestial Pole in this case) is essential with the alignment of your mounts to be able to track the night sky for both visual and astrophotography respectably. Earth sits on a current but variable tilt of 23.5 degrees, which we believe was created by a planet (research suggests it could have been the size of Mars) which was orbiting close to our orbit, and eventually collided with the young Earth, helping to form its core, creating the moon and knock the planet on its current tilt variation (22.1 – 24.5 degrees which have an average cycle of about 40,000 years). Not to mention giving us our four seasons.
A little demonstration below on the theory of how this happened is below. |
Polaris is known as the North Star, or the pole star, has a magnitude of around 1.98 and is the brightest star in the constellation of Ursa Minor. That said, it still can be tricky to find for first-time lookers. It isn’t truly in the centre of the axis either. It orbits extremely close to the centre point of the axis. so when aligning the mount, you are not aligning to the star, but very close to it depending on its location at the time. This alignment can be done either manually or electrically assisted. Electronically assisted will be more accurate and provide better and more stable results throughout the night, but for visual astronomy, you can get away with alignment to the star itself.
This also means Polaris is a temporary means to find the celestial pole as over the ages, partially in line with the tilt above, but on a shorter cycle of about 26,000 years, The poles orbit around slowly moving past different stars. As time goes by, like 14,000~ years from now, the Celestial Pole will be closer to Vega than Polaris making this guide, umm, a little irrelevant...
|
|
|
Left: Zoomed in view of Polaris orbiting around the axis. Right: 12k years time with Vega is closer to the Celestial Pole.
Zotti, G., Hoffmann, S. M., Wolf, A., Chéreau, F., & Chéreau, G. (2021). The Simulated Sky: Stellarium for Cultural Astronomy Research. Journal of Skyscape Archaeology, 6(2), 221–258. https://doi.org/10.1558/jsa.17822
Zotti, G., Hoffmann, S. M., Wolf, A., Chéreau, F., & Chéreau, G. (2021). The Simulated Sky: Stellarium for Cultural Astronomy Research. Journal of Skyscape Archaeology, 6(2), 221–258. https://doi.org/10.1558/jsa.17822
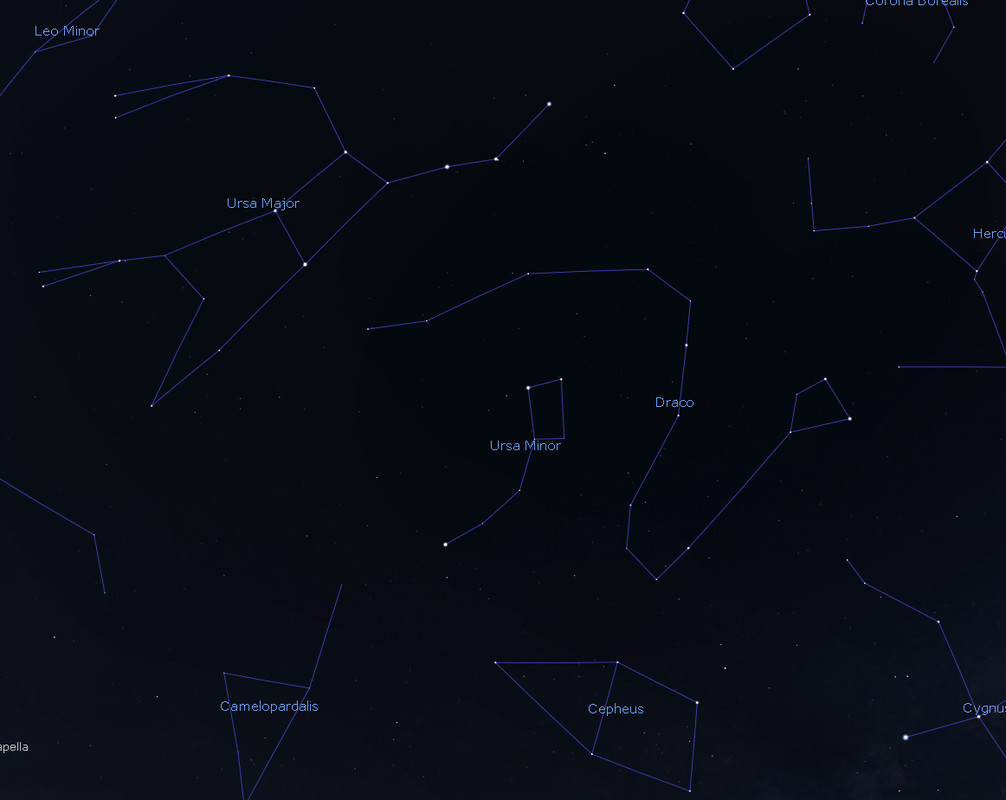
Polaris can be found in the North direction. Using these constellations (Ursa Major, Ursa Minor, Draco, and Cassiopeia) will make finding Polaris much simpler. Firstly you must orientate yourself and know the rough location of North.
North will have all the circumpolar Constellations which never set. These will help you find and locate Polaris and also these will become very familiar to you as time goes on – to the point these will stand out (or at least parts of it) in the night sky.
North will have all the circumpolar Constellations which never set. These will help you find and locate Polaris and also these will become very familiar to you as time goes on – to the point these will stand out (or at least parts of it) in the night sky.
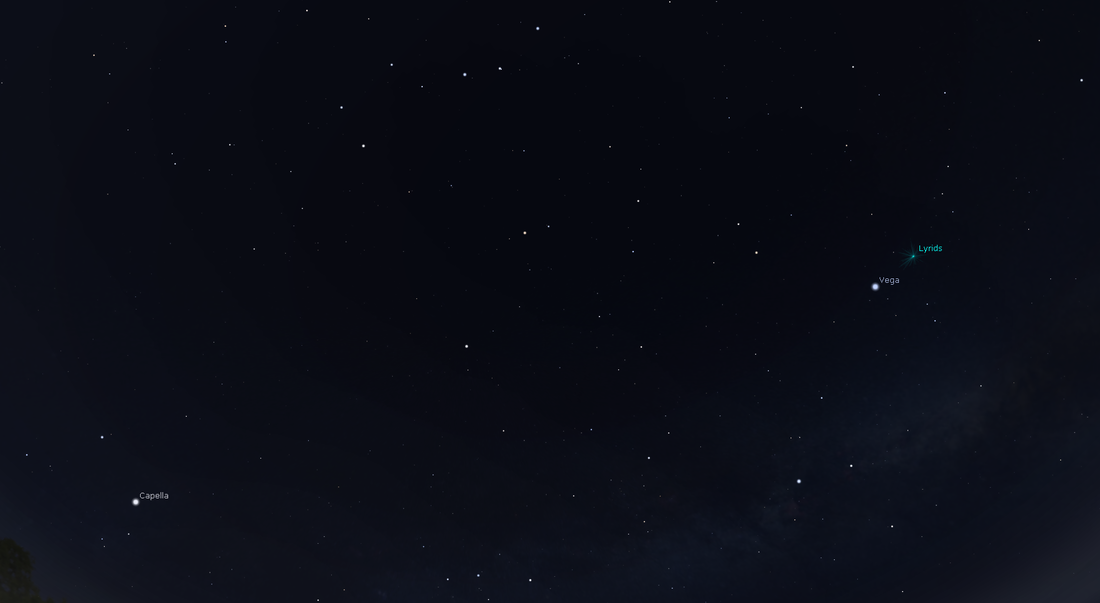
Firstly, with the help of Stellarium, this is the Northern part of the night sky. This shows all the constellations, some of which might not be known to you. But parts of it will be from the shapes they make. Ursa Major is a good example, the full Constellation below is hard to pick out in the night sky.
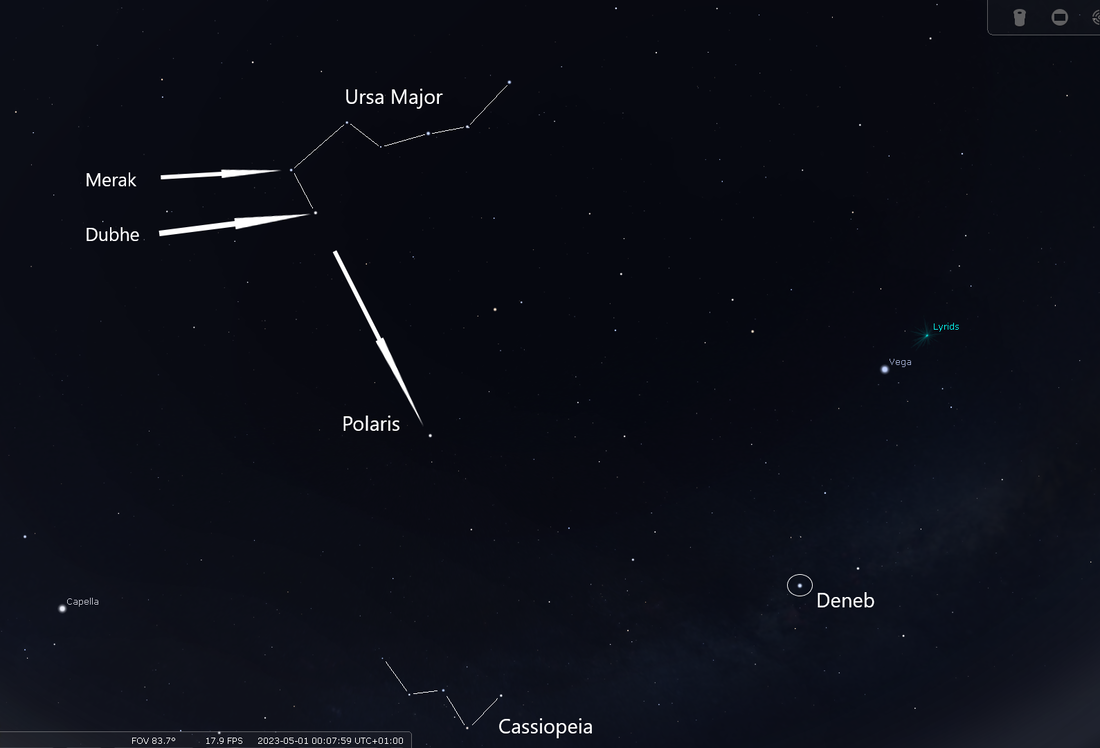
But Ursa Major below with only some of the constellation lines shown actually helps identify the "Saucepan" or "plough" which is much more known in the sky. This asterism (pattern) helps locate Polaris using two of the stars which point in the general direction of Polaris by using two of the stars which are known as Merak and Dubhe which can be seen in the picture below. other points in the sky are Vega, Deneb and Capella stars which are naturally labelled by the software.
Polaris sits roughly centre between Ursa majors Dubhe star and the Cassiopeia Constellation which is easy to spot out by the W shape of the constellation.
Polaris sits roughly centre between Ursa majors Dubhe star and the Cassiopeia Constellation which is easy to spot out by the W shape of the constellation.
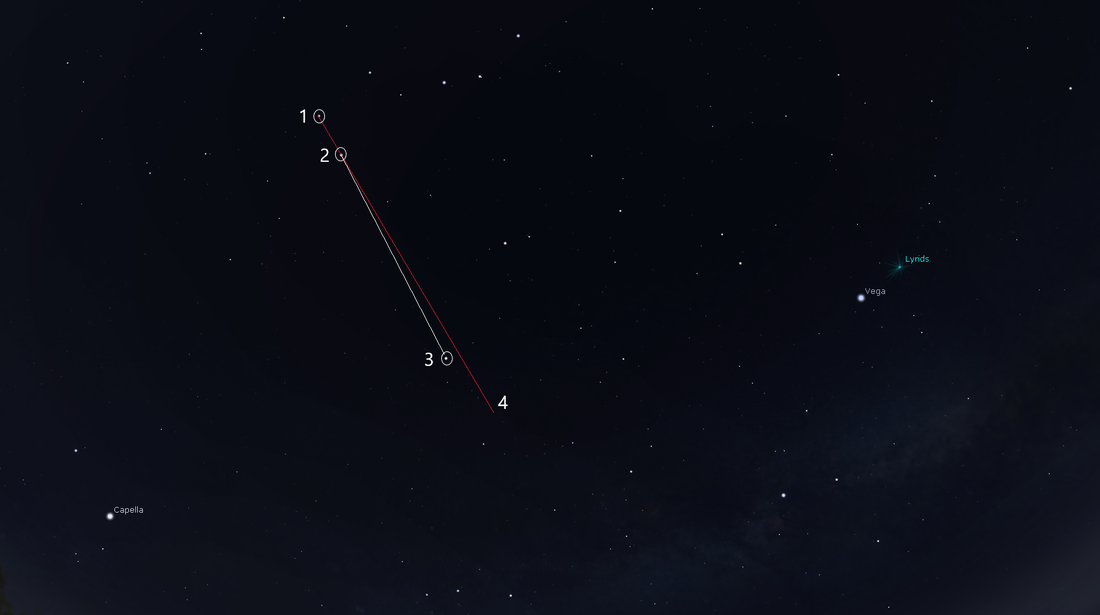
While we are using these two stars, they don't directly go towards Polaris. they go off slightly to the right of Polaris. Below you can see this angle. While the angle isn't massive it can lead to other nearby stars which will give massive errors with the mount's tracking. Numbers 1 and 2 are Merak and Dubhe respectively. Number 3 is Polaris and number 4 is the true direction of numbers 1 and 2 which is in red to help it stand out slightly.
An easy example and a not-so-easy example.
Let's see if you can find Polaris in this easier picture. You will recognise the picture as it's the same picture above with no labels on it. Try to find Polaris without referring to the picture above.
Let's see if you can find Polaris in this easier picture. You will recognise the picture as it's the same picture above with no labels on it. Try to find Polaris without referring to the picture above.
This is an easier demonstration using the above methods to find Polaris. The picture is the same as all the rest so far on this page, with unrealistic night viewing. The night sky can be very different, but this was a good start.
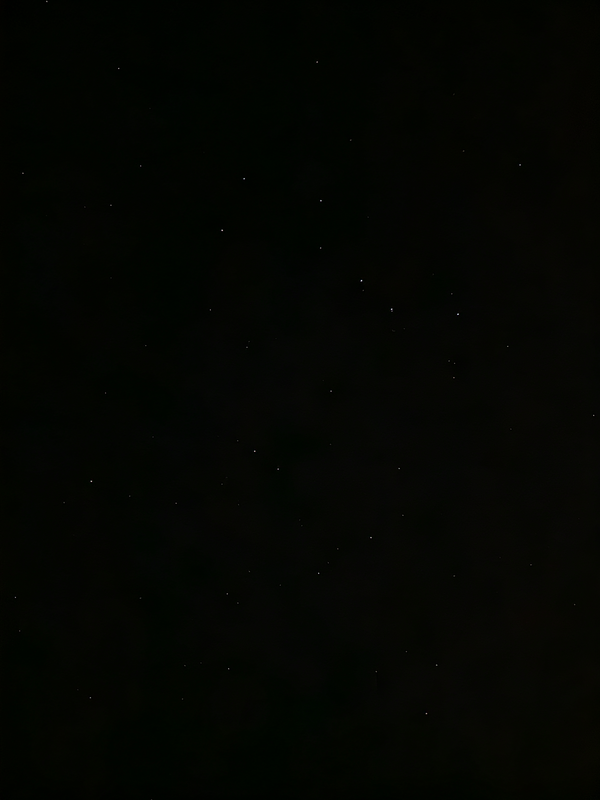
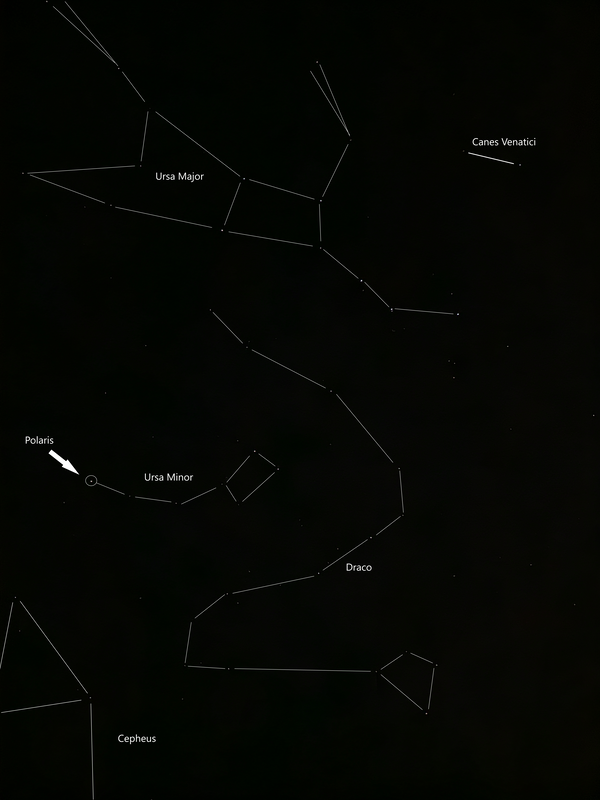
So let's try again, but this time with an actual photo from my camera of a wide field view (it is amazing what a phone can do these days - but don't laugh at the stars, it was done to help with this post and not for pinpoint stars). This one is significantly more difficult, and something you might find during the night.
Again, have a try. If you struggle Scroll up and have a look at previous pictures to get a sense of the location of certain stars.
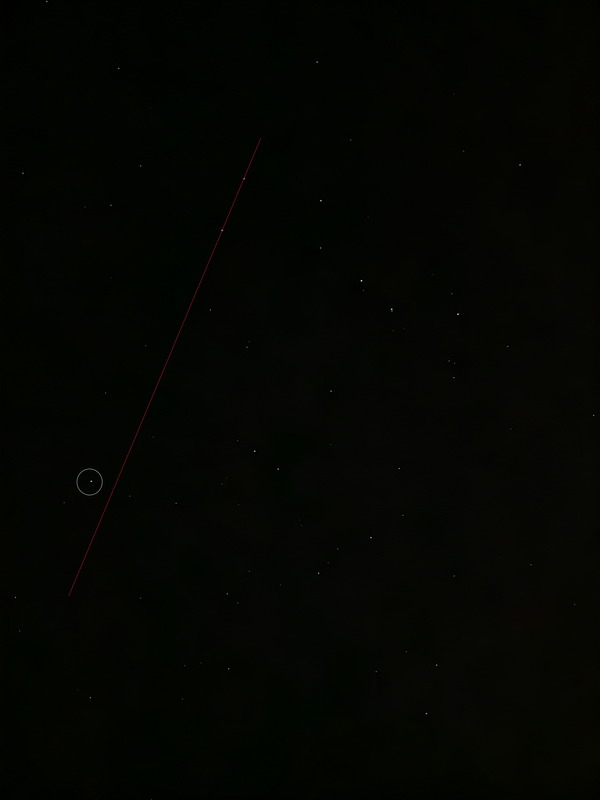
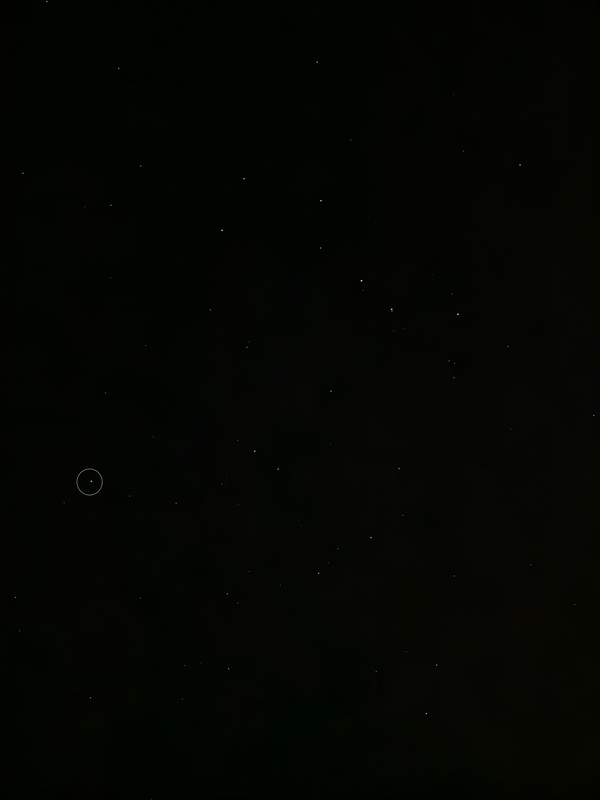
You can see the plough sticking out like a sore thumb! The part of Ursa Major which stands out over the rest helps with location. See below for Polaris location.
The differences in an actual photo and software can show the difference between easily finding Polaris and picking the wrong star. The actual photo was around 6 seconds of exposure at F1.8 using my phone. Below are the constellations in the picture mapped out to make it easier to spot them. Since you can zoom in on the software it is hard to get an understanding of the Field of View your eyes have in the night sky, and as such, you will overestimate the angles and distance between stars from the software and a photo.
when your eyes adjust to the dark skies and also being in a good bortal location, the night sky is made worse as faint stars are easily viewable with the naked eye. making constellations sometimes harder to see.
when your eyes adjust to the dark skies and also being in a good bortal location, the night sky is made worse as faint stars are easily viewable with the naked eye. making constellations sometimes harder to see.
once you are used to the northern part of the night sky, Polaris is easy to spot. It is one of the first stars out in the North and once you know its angle, you will find it super easy to spot in the night sky, or even just after sunset when only the brightest stars are out.
I hope you found this beneficial in locating Polaris and helping you on your astrophotography journey.
I hope you found this beneficial in locating Polaris and helping you on your astrophotography journey.

